Have you ever tried making your own zero waste Christmas ornaments? They’re a lot of fun to make, and they produce little to no waste! Or, at least, the waste they produce can be composted. If you’re looking to have a zero waste Christmas or holiday season, you’re likely to have a Christmas tree. But Christmas decorations can get a little wasteful. If you walk around shopping malls and spot Christmas decor, you’ll likely find TONS of plastic ornaments and tree decorations. The worst part? So many people purchase ornaments and decorations they’ll use only once. Just once. Isn’t that insane? It’s also incredibly wasteful. Instead, how about we choose some plastic free, DIY ornaments instead? These ornaments are cheap, easy to make (with a little patience), and you’ll likely have the ingredients to make them already on hand. Also – fun fact – all of them are compostable at the end of their life. In fact, most of them are made from food items. So cool, right? And that only adds to their charm, in my book. Though, if you wanted to store these for another Christmas, you probably could (if done carefully enough). If not, no worries – you just toss it into the compost bin and next year you make more. Definitely beats buying a bunch of new ornaments and sending them to landfill after one use. Without further ado, here’s how to make some amazing, zero waste ornaments.
Zero Waste Christmas Ornaments
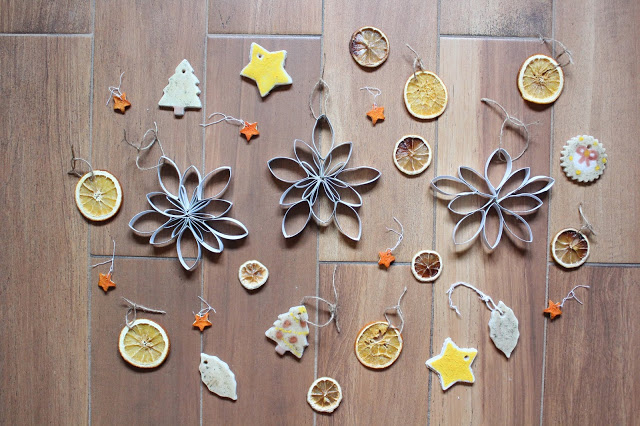
Ready to make some zero waste Christmas ornaments? I promise that all of these are super unique and totally fun to make. And you don’t have to make all of them – you can pick and choose which you like best! I really loved making all of them so it’s hard to choose which my favorite is. I personally think the snowflakes and orange peels came out the prettiest, but they’re all adorable in their own way! Lets jump right in, shall we?
Toilet paper snowflake ornaments
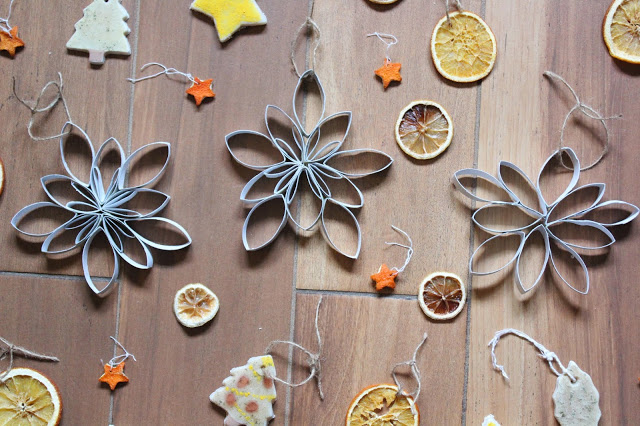
Want to really wow your guests and loved ones? Make some of these stunning toilet paper snowflakes! This is such a great craft to make with kids, and it keeps toilet paper tubes out of the landfill.
You can also use paper towel tubes, if you have those as well. It’s a great way to upcycle them!
Perhaps the best part about these simple but beautiful ornaments is that they’re completely compostable at the end of their life. How so? Well, besides them being made of paper, the glue used is all natural too! I made my own DIY glue (which I explain more about later) to do this project, but you can also get plastic-free, biodegradable glue online as well (if you’re not into DIYs).
Ready to jump in?
You’ll need:
- Cardboard tubes (as many as you like – the more the better! I saved about 10 altogether)
- Scissors
- Plastic-free, non-toxic glue (DIY glue directions below)
- A brush
- Jute twine
- 1 cup of sugar
- 1 1/2 cup of flour
- 4 cups of water
- 2 tablespoons baking soda
- 3 tablespoons of vinegar
Directions (for the DIY glue):
- Begin by putting the water into a big pot. Add the flour and turn the heat on low to medium, stirring it in. Mix it and don’t stop stirring until it’s well combined.
- Once the mixture of water and flour gets warm, add the sugar and don’t stop mixing until well combined.
- Now, add the vinegar. Mix well, then add the baking soda – this will cause your solution to bubble up a bit and thicken. This is what you want and also why I recommend using a big pot, so nothing overflows.
- Continue to mix until your glue has become thick – when it starts to get hard to mix, that’s when you know it’s done. Remove from heat and let it cool, then transfer over to the container of your choice – it will make one jar full. Store your glue in the fridge when not in use to preserve it’s life.
- First, fold the toilet paper tubes in half, then cut them along the shorter side with the width about 1 cm for each of the cuttings.
- Among your cuttings, take five of the bigger ones and glue them together (you want it to resemble a flower), using the brush to put glue only on the ends. Press with your fingers until the two pieces of cardboard are perfectly fixed together. Give it a few minutes to dry (especially if using homemade glue) before you try gluing more to it. The homemade glue needs about 10 to 20 minutes to dry, I’ve found, so be patient!
- Once all five cuttings have been glued, it’ll look kind of like a flower (ideally). To make it look more like a snowflake, glue another five cuttings between the petals you just created. Ideally, these cuttings should be a bit smaller in size. Make sure to put the glue only on the corners and press them together with your fingers. Let it dry before gluing more.
- Get even more elaborate by folding some cuttings in half and attaching them inside the five larger “petals” that you glued together at the beginning. This will create a really beautiful presentation and make it look even more like a snowflake. A general tip? Try to keep everything as symmetrical as possible for best overall design. But it’s okay if your snowflakes don’t all look the same – no two snowflakes are the same in nature, anyway! Not all of mine match and I kind of like it better that way, if I’m being honest.
- If you’re feeling it, you can bedazzle these or paint these. I want to compost these at the end of their life, so I left them as is. Plus, I like them better that way. If you do choose to decorate them, please upcycle some beads, rimstones or jewelry you already have, instead of going out and buying more.
Salt dough ornaments
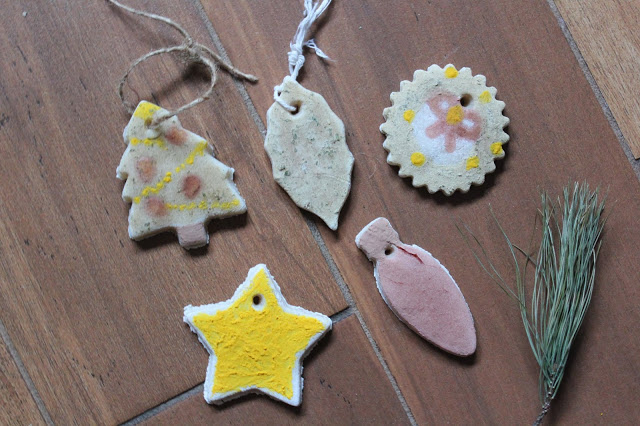
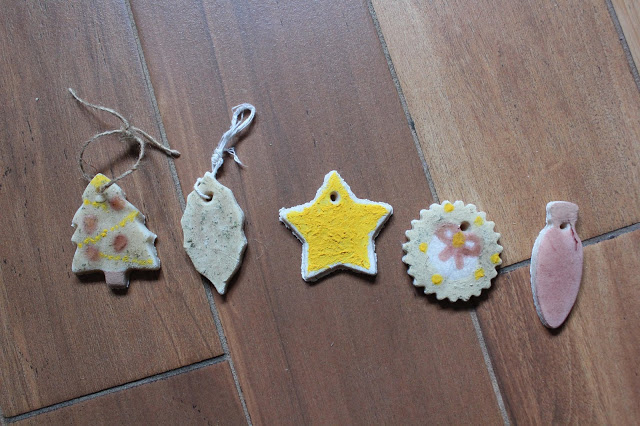
These salt dough ornaments were fairly simple to make, but there are so many ways to get creative with them! I decided to paint mine using all-natural paint made from plants (more on that later), but you can also use natural food dye.
I also wrote a few cute merry little sayings on them like “Happy Holidays” and “Merry Christmas” – with a sharpie (not pictured).
If you want to paint yours too, I explain exactly how to make the natural plant paints below.
Also, if you’d like to, you can add the dyes straight to the dough before you cut them into shapes – this will give the dough a tint.
Yet another idea to consider is adding some herbs (fresh herb leaves, dried flowers, etc), tea leaves or whole spices (star anise or cloves) to your dough to create a natural and botanical effect. You can get most of these at the bulk food store in your own container.
Either way, I love the fact these salt dough ornaments can be composted at the end of their life. Total win!
Ready to get crafting?
Ingredients (for salt dough):
- 3/4 cup of salt
- 1 1/2 cup of flour
- a little less than 1 cup of water
Note: Makes approximately 24 salt dough ornaments!
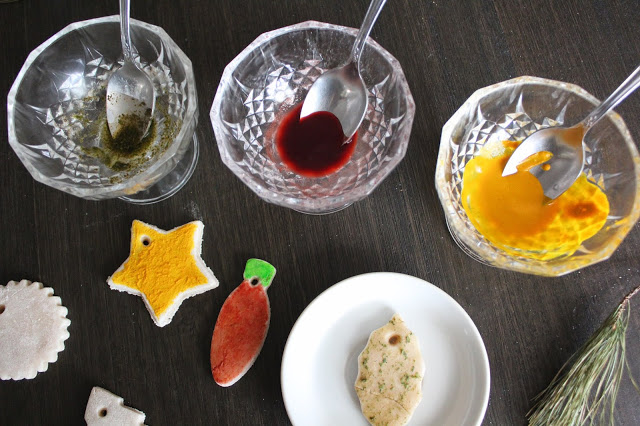
Ingredients (for natural plant paints):
- For red: 1/2 teaspoon of beet root powder, 1/2 teaspoon of arrowroot powder, 1/2 teaspoon of water
- For yellow: 1/2 teaspoon of turmeric powder, 1/2 teaspoon of arrowroot powder, 1/2 teaspoon of water
- For green: 1/2 teaspoon of (crushed) dry mint leaves, 1/2 teaspoon of (crushed) dry thyme leaves, 1/2 teaspoon of arrowroot powder, 1/2 teaspoon of water
- For brown: 1/2 teaspoon of cocoa powder, 1/2 teaspoon of arrowroot powder, 1/2 teaspoon of water
- For white: 1/2 teaspoon of arrowroot powder, 1/2 teaspoon of water
Directions (for natural plant paints):
- In a small bowl or dish, mix together your ingredients until well combined. You’ll want to have separate little dishes or bowls for each color. If you feel you need more water or more arrowroot powder, feel free to add it and mix it in well until it’s the consistency you want. Make sure you crush the mint and thyme leaves (I used a mortar and pestle) before combining it with the water and arrowroot. Apply using a clean paint brush.
Directions (for salt dough):
- Begin by making your dough. In a big bowl, whisk your flour and salt together. Add a little less than one cup of water. If you want your dough to be a certain color, now’s a good time to any any natural food dye or natural pigment – I just left mine white and decided to paint them afterwards. Knead until dough forms (this should take about 3 to 5 minutes).
- Lightly flour your counter or cutting board, along with your rolling pin. Partially roll out your dough. If there’s any botanical elements you’d like to add to your dough, now’s the time. They’ll stick nicely into the dough if you roll them in. Also, dry elements will have a harder time sticking than fresh ones – trust me on this. I tried adding dry pine needles to mine and it just turned into a prickly mess. You’ve been warned. I settled on keeping mine plain.
- Arrange whatever decorative elements you’re adding and finish rolling out the dough. Then, cut out your desired shapes – I made stars, leaves, tree lights, etc. Make sure to poke a hole for stringing your ornaments – I used a bottle closer to do this, but a meat thermometer is another good option. Just make sure you push the tool of your choice through your ornament and that there’s a hole on both sides.
- Transfer over to a cookie tray carefully. Preheat your oven to 200 degrees F and bake the ornaments for about 10-15 minutes, making sure they don’t burn. Once they’re done, remove them and let them cool before you decorate them any more. If you didn’t add any botanicals, you may want to paint them at this time or write sayings on them. Get creative! Also, if using the natural paints I suggested earlier, please note that they do tend to dry a different color than they apply. Because they’re natural, they’re also lighter in color! You can layer them to create a bit of a stronger hue.
- String your natural salt ornaments using some twine and show them off!
Dried citrus ornaments
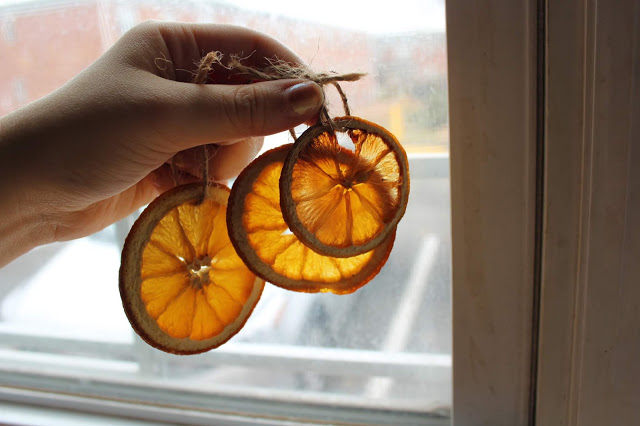
What I love about this DIY is that you can also use the dried citrus for other things as well – you don’t have to just make ornaments with them! You can make a fantastic citrus garland with them using some jute twine – just poke a little hole through them and string them up.
Personally, I love using these to decorate my zero waste gifts! They make amazing gift decor. I tie them onto my gifts using twine and they truly add such a beautiful rustic look to my gifts.
Related: 50 Last Minute Zero Waste Gifts + How to Wrap Them Waste Free
Ready to get crafting?
Ingredients:
- oranges + lemons (cut into slices, use as many as you like – I used 2 of each)
Note: To be as eco-friendly as possible, please grab these at your local farmers market (if they’re sold there). If not, get them at the grocery store, package free. Use a reusable produce bag instead of a disposable one. I love this adorable organic produce bag – it’s made from cotton and has a cute lemon stamp on it! So fitting.
- Cut the citrus fruits about 1 cm ideally (thin enough, but not too thin they burn). Gently dap off any extra moisture on the slices (this will help them dry quicker).
- If you have a dehydrator, place them on the racks and let them dry at 130 degrees F for about 2 hours.
- If you only have an oven (aka me), preheat it to 200 degrees F. Place the orange slices on a baking sheet and leave them in the oven for 2 hours. Make sure to flip them every 30 minutes or so, to prevent them from sticking to the tray.
- Once your citrus is dried out, and it cools off, take some twine and knot it through the citrus so that you can hang it off your Christmas tree. You now have zero waste Christmas ornaments!
Orange peel star ornaments
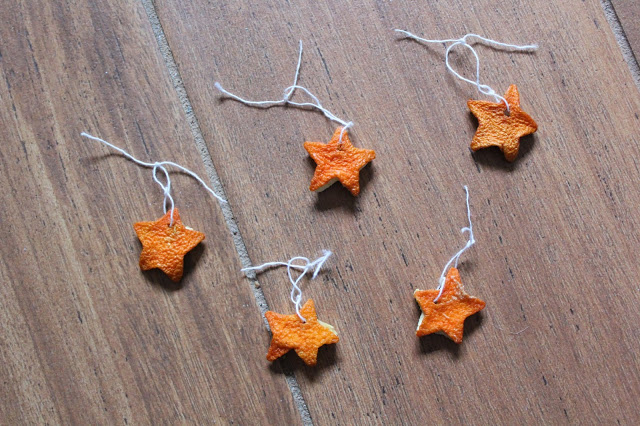
These are the sweetest little ornaments ever. And they smell great! They’re a fantastic way to utilize the skin of an orange. But make no mistake, you can also use the skin of a grapefruit, lime or lemon, if you so choose!
Ready to get crafting?
You will need:
- 1 to 2 oranges (one orange makes about 12 stars)
Directions:
- Cut off both ends of an orange, then peel it by running a knife from end to end. Carefully remove the peel and try to keep it as intact as possible. Cut it into two or three pieces.
- Grab a small 1 inch star cookie cutter, then cut out your stars from the peel.
- With a metal pin or the end of a knife, poke some holes into the top of each orange peel star. Be careful – you want to make the hole big enough but not so big it rips the star apart (which did happen a few times to me).
- Cut twine or string and thread it through the holes you made. This may be tricky – I found the thinner the string I use the better it worked, but too thin and it’ll be a pain too. Tie it to make your ornament.
Other ornament ideas:
Still looking for more ideas? Here’s a few that come to mind:
- Transform old Christmas cards into ornaments by cutting out pretty images, creating a hole, and tying some twine through it so that you can hang it up for display.
- Pine cones make really cute ornaments and decor. Use some twine to hang them on the tree branches!
- Go to a local thrift shop and find secondhand ornaments that you can reuse for years to come. This will help keep ornaments out of the landfill!
- Support local artists by buying locally made ornaments. It’ll have so much more value if it’s been handmade, rather than mass produced!
Will you give these zero waste Christmas ornaments a shot?
If you enjoyed this post, be sure to share it! If you like my content, sign up for my newsletter to get notified every time I write a new blog post. To support me even further, please consider buying me a cup of tea to help support my blog.







Great ideas! I missed the salt dough idea so I might do that one. You could also consider adding pop corn garland which a friend of mine had recommended!
Thanks so much! 🙂 You should definitely give it a go! I highly recommend using matcha or spirulina powder if you want to paint them green – I just got my hands on some matcha and omg the color difference is amazing! Also, I updated the post to include how to make white too. Might upload new pictures to showcase the new salt dough ornaments I made with these colors as well. ^_^ And I love your corn garland idea!! You can also use the dried citrus to make a garland as well. 😀